Kapitel 2: Scoring Override
Lesson 2: Evaluating Scoring Statuses
Learning Objectives:
- Describe how Pins, Toggles, Yellow Pins, and Midfield robots contribute to the final score.
- Determine which alliance owns Yellow Pins.
- Determine whether a robot is in the Midfield.
- Apply scoring rules to different field scenarios.
In this lesson, you will practice applying Override scoring rules to different game situations. You should continue to use the Game Manual as the source for exact scoring criteria. The goal of this lesson is to help you understand what to look for, how to work through scoring decisions, and how to support other referees when scoring statuses are close or unclear.
This lesson walks through examples of scoring to help you see how these worked examples would be evaluated. This is by no means an exhaustive list of scenarios, but a way for you to gain comfort in confidently deciding scoring statuses.
Evaluating the Field
- When evaluating a Quadrant:
- Determine which Quadrant you are looking at (Red Quadrant 1 or 2 or Blue Quadrant 1 or 2).
- Count the visible Red, Blue, and Yellow Pins that are Placed.
- Assign the Toggle to the color shown. The Toggle determines Yellow Pin ownership.
- When evaluating the Midfield:
- Count the visible Red, Blue, and Yellow Pins in the Midfield Goal.
- Check how many robots have crossed into the Midfield for each alliance. The alliance with more robots in the Midfield owns the Yellow Pins.
Quadrant Example
In this example, you are evaluating Blue Quadrant 1 at the end of the match. Remember that a Quadrant is one of four designated triangular areas of the Field. Each Quadrant contains two Goals and one Toggle. In Blue Quadrant 1, the Blue Goal is on the right.
Scenario
- The Neutral Goal has three visible Pins – 2 Red and 1 Blue.
- The Blue Alliance Goal has four visible Pins – 4 Yellow and 1 Blue.
- The Toggle for this Quadrant is set to Red.
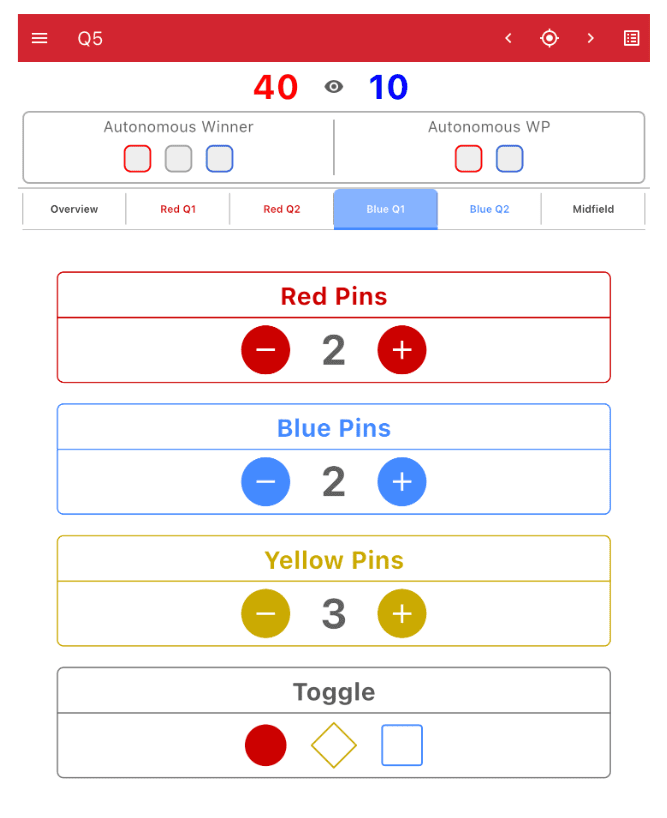
Referee Takeaway
Toggles are a great way to gauge which alliance has more points in a Quadrant. "In this example, consider what would happen if the Toggle color changed:
- Yellow: the score would be tied at 10.
- Blue: the score would be 40 for the Blue Alliance and 10 for the Red Alliance.
Always check Toggle state before assigning points for Yellow Pins. In Override, ownership can create large point swings even when the stack is located in an alliance-colored goal.
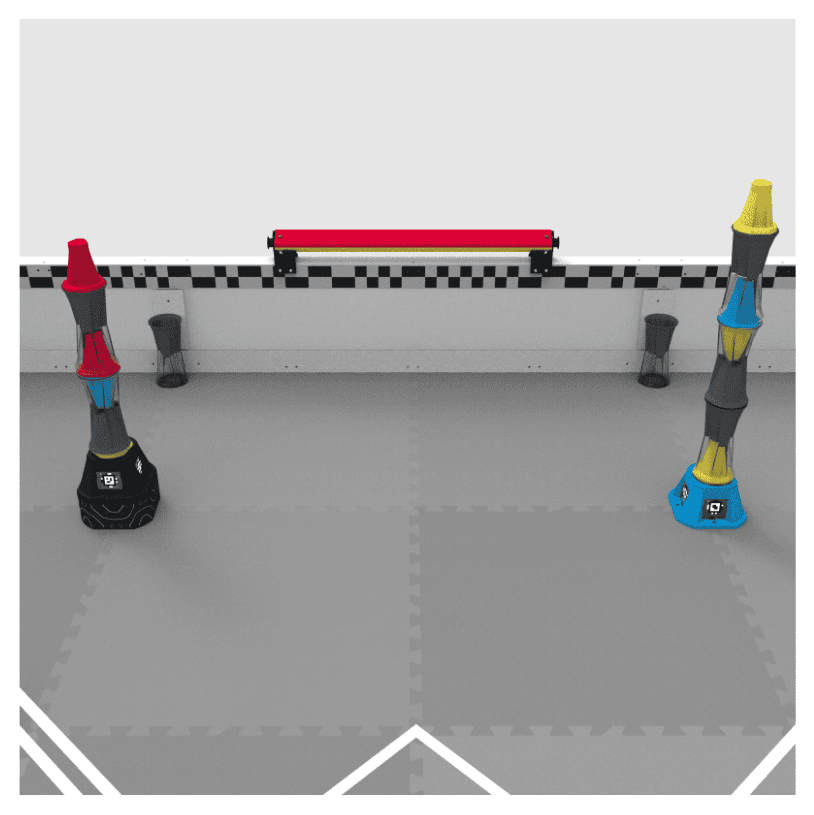
Midfield Example
In this example, you are evaluating the Midfield at the end of the match. Remember that the Midfield is the square area at the center of the field created by the tape lines.
Scenario
- The Neutral Goal has three visible Yellow Pins.
- Three robots are in the Midfield – 1 Red and 2 Blue.

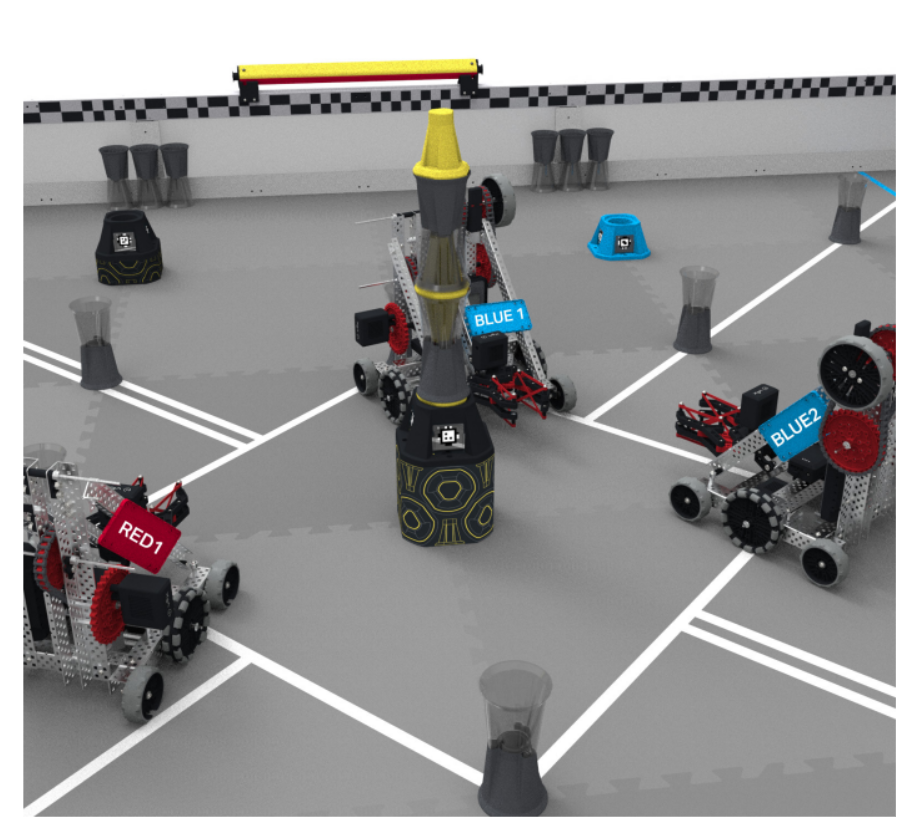
Referee Takeaway
The Midfield has two different scoring considerations: robot points for being in the Midfield, and Yellow Pin ownership for the Center Goal. These are connected, but must be evaluated independently. If only one robot from the Blue Alliance was in the Midfield, none of the Yellow Pins would be owned by an alliance and would not be scored. This would change the score to 8 points for each alliance.
To determine whether a robot is in the Midfield, look at the inside edge of the tape line. If any part of the robot crosses that inside edge and breaks the vertical plane of the Midfield at the scoring evaluation point, the robot counts as in the Midfield.
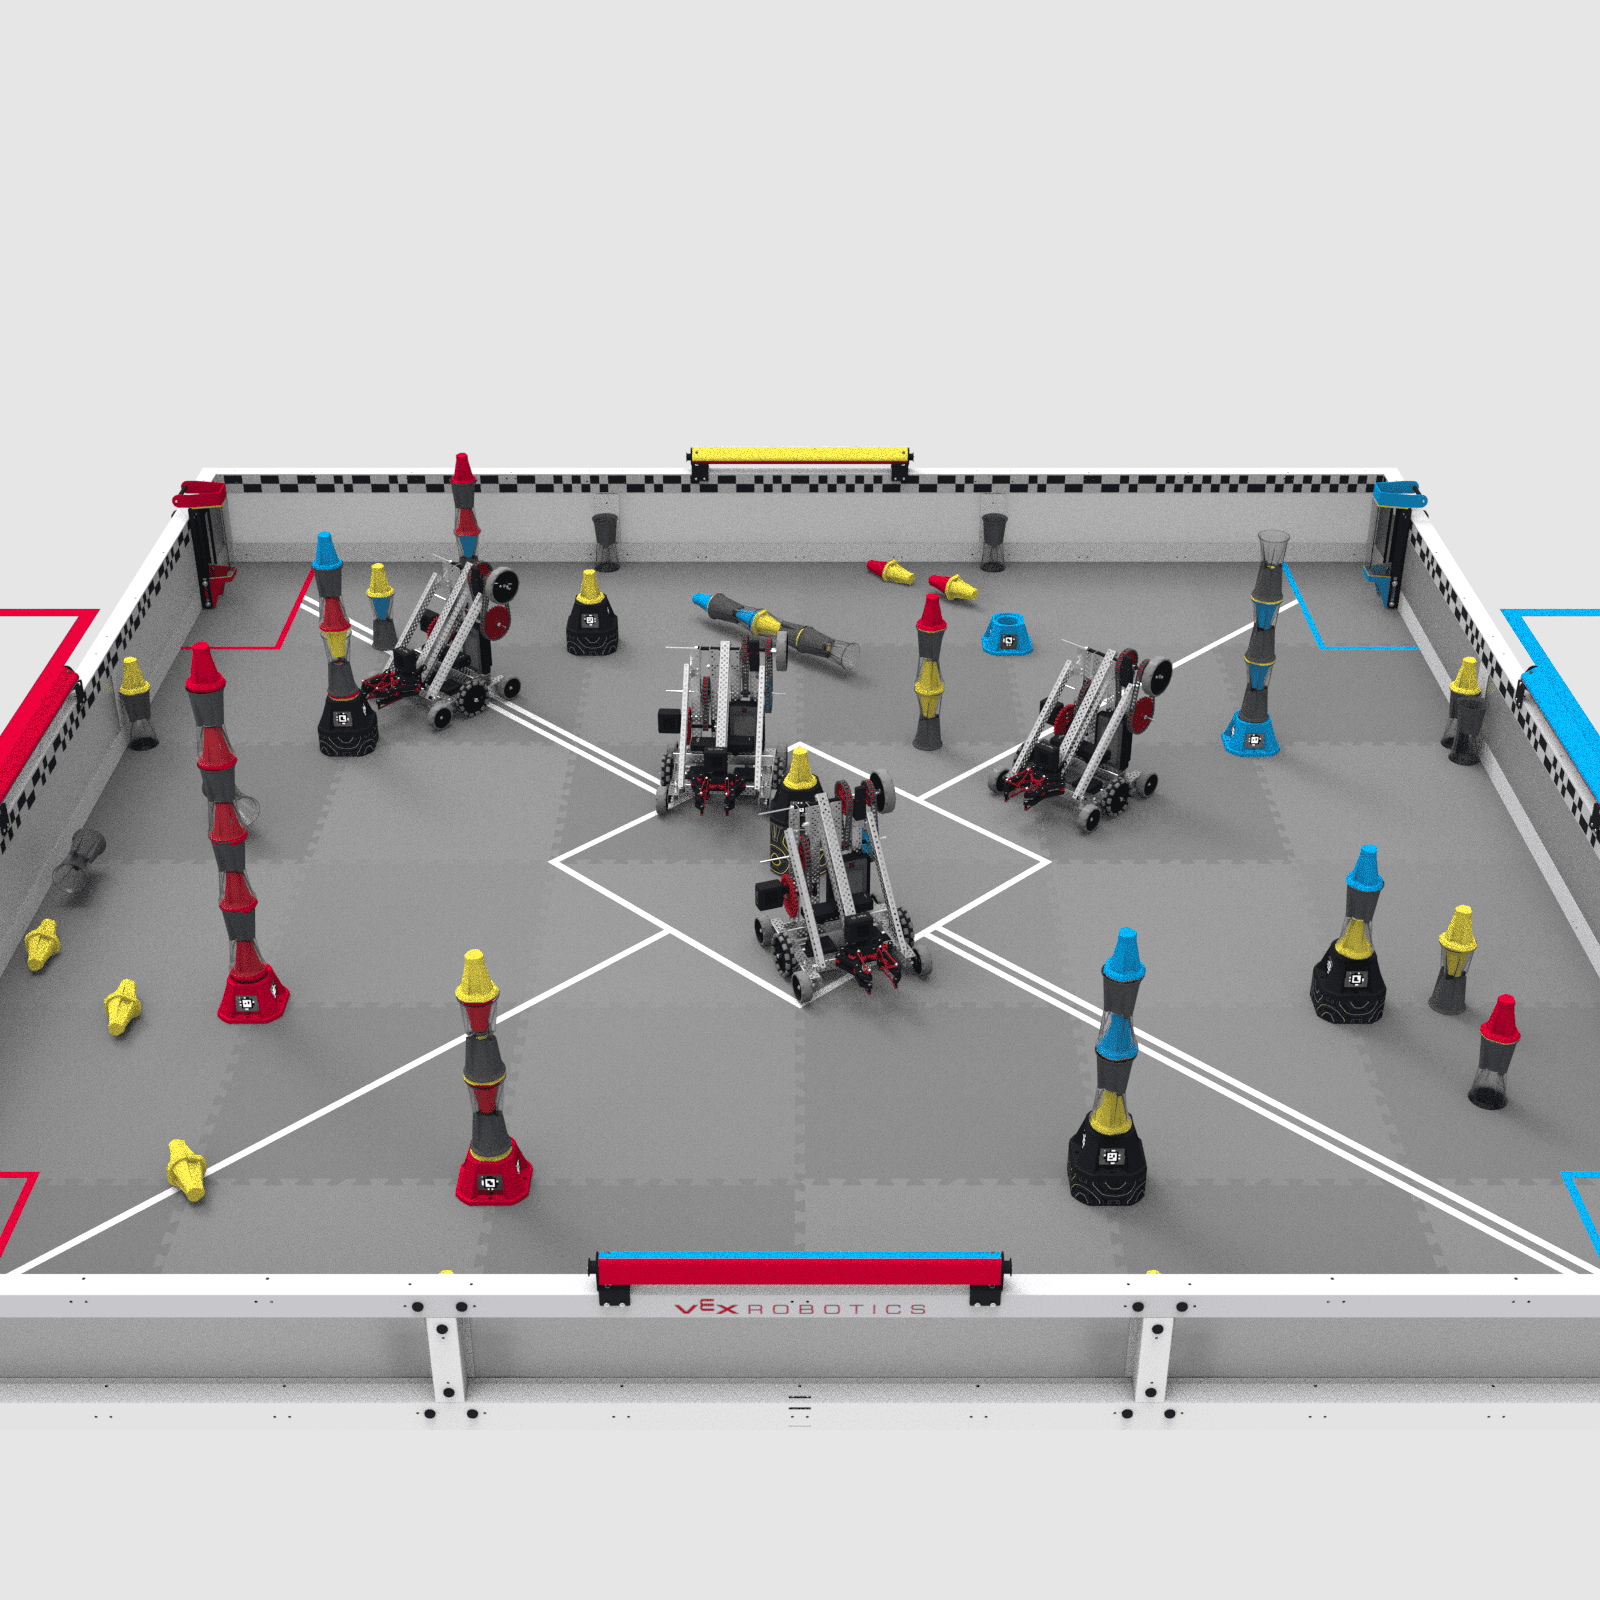
Review
When scoring at the end of a match, continue to break the Field into manageable sections. By evaluating Quadrant-by-Quadrant, you can focus on getting each section scored accurately before moving on to the next. The Check Your Understanding questions for this lesson focus on evaluating and scoring a specific example field shown below. Use the image below, the Game Manual, and the examples on this page to help you. Note that the two robots in the Midfield at the end of the match are from the Blue Alliance.