


Analyzing and Applying EXP Sensor Data
Overview
Sensors in the EXP system do exactly as their name suggests; they sense things. Without these sensors, your build has a hypothetical ceiling above its head with what it can do. Meaning, we would have to take every single aspect relative to our robot into careful consideration and put it into code. The use of sensors aligns closely with the saying, think smarter, not harder. The hard part when it comes to utilizing sensors, is analyzing and applying the pertinent information they provide, which this article will elaborate upon.
Information and Placement
Sensors should be mounted in the most optimal location relative to their use. For instance, a Bumper Switch should be placed at a height where it will collide with another part, an Optical Sensor should be placed where it will encounter a foreign object, and a Distance Sensor should be placed where there is a large amount of space in front of it. Understanding where to mount these sensors according to their use is the first step in applying EXP sensor data. Let’s look at these examples more in depth.
Bumper Switch
The VEX Bumper Switch is based on probably the most commonly used electrical device: the switch. A switch consists of two terminals (places to attach a wire) and a wire bridge to 'make' the connection when the switch is pressed, which is received by the Robot Brain. The placement of the switch depends entirely on the scenario of usage. The scenario used the most with EXP involves the bumper determining if your robot has come into contact with another object. For example, the Bumper Switch could be placed on the back of the robot (as in the example image below), and used to stop the robot from driving when it is pressed. This scenario requires the Bumper Switch to have a clear path between the front of the sensor, and any object being pressed against the sensor. Ensure no structure on the robot is in front of the button on the face of the sensor. Ensuring this means you will obtain accurate readings when your button is pressed.
Optical Sensor
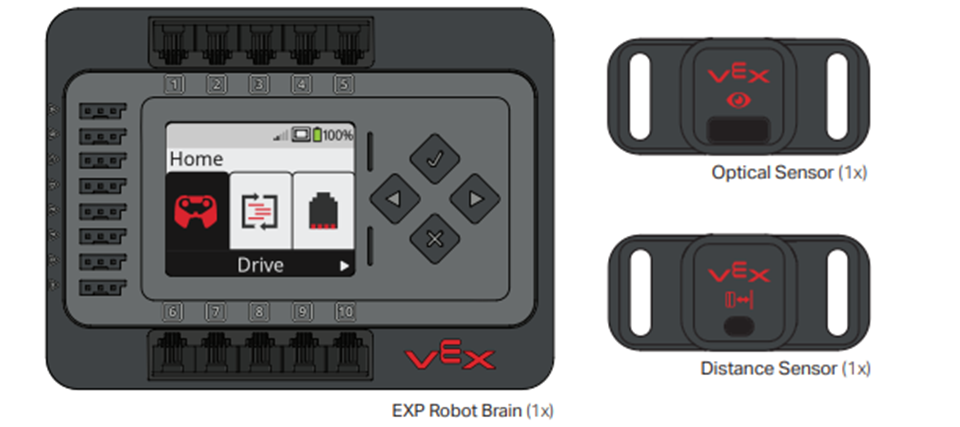
The Optical Sensor is a combination of the ambient light sensor, color sensor, and proximity sensor. The Optical Sensor is able to accomplish these as it receives light energy and converts the energy into electrical signals. The sensor's internal electronics (a hardware state machine) converts these signals into output signals to be received as an input by the EXP Brain.

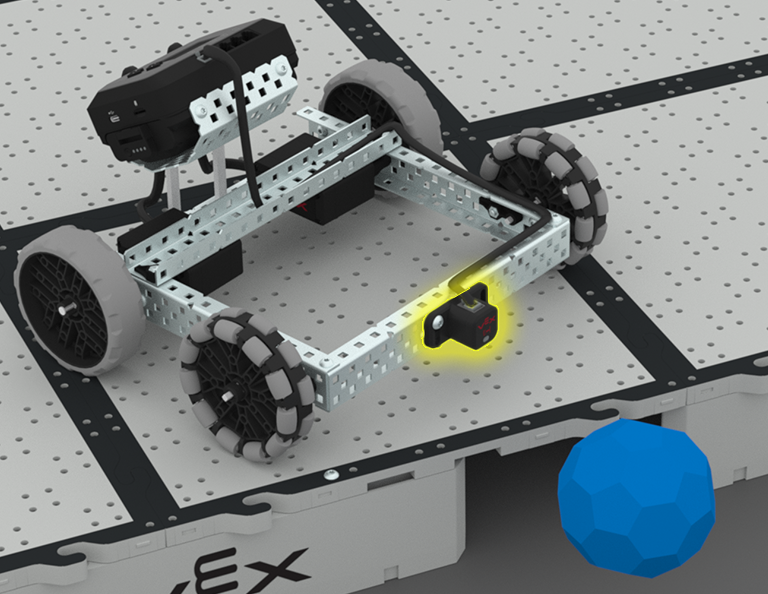
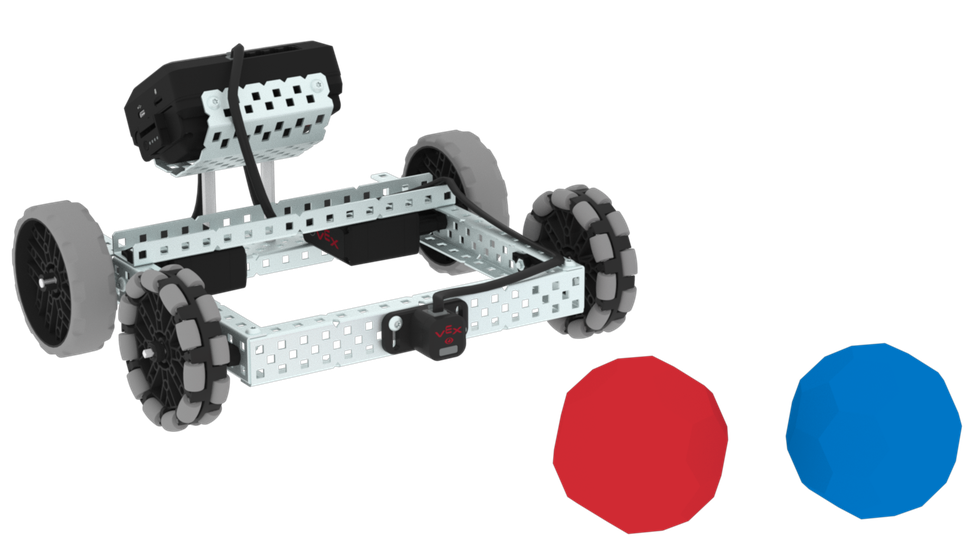
Again, the placement of the sensor depends entirely on the scenario of usage. The scenario used the most with EXP involves the Optical Sensor determining the color of another object. For example, the Optical Sensor can be mounted on the front of the EXP BaseBot and used to distinguish the color of Buckyballs (as shown in the image to the right). This scenario requires the Optical Sensor to have a clear path in front of the sensor between any object being measured, and the sensor. Ensure no structure on the robot is in front of the small Optical Sensor window on the face of the sensor. Ensuring this means you will obtain accurate readings when an object comes into its view.
Distance Sensor
The Distance Sensor has the capabilities to measure distance, detect objects, determine object relative size, and report object velocity. The Distance Sensor is able to accomplish these as it sends out a pulse of a Class 1 Laser and measures the amount of time it takes for the pulse to be reflected.
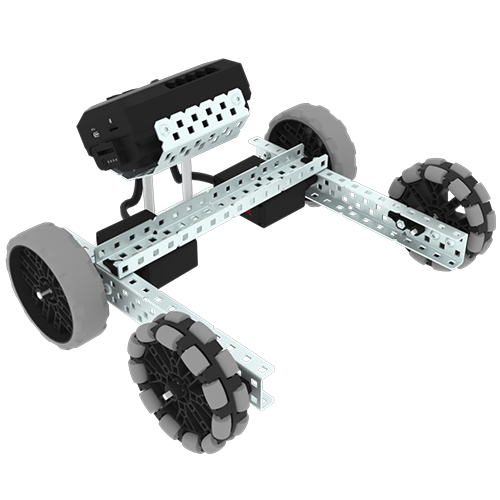
The scenario used the most with EXP involves the Distance Sensor determining the distance to another object. For example, the Distance Sensor can be mounted on the front of the EXP BaseBot and used to distinguish how far the sensor is from Buckyballs. The BaseBot may be coded to drive toward Buckyballs and push them off of a raised Field (as shown in the image below). This scenario requires there be a clear path in front of the sensor between any object being measured, and the sensor. Ensure no structure on the robot is in front of the small sensor's window on the face of the sensor. Ensuring this means you will obtain accurate readings when an object comes into its view.
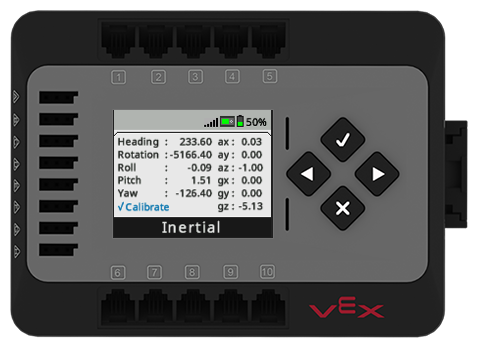
Inertial Sensor Data from the VEX EXP Brain
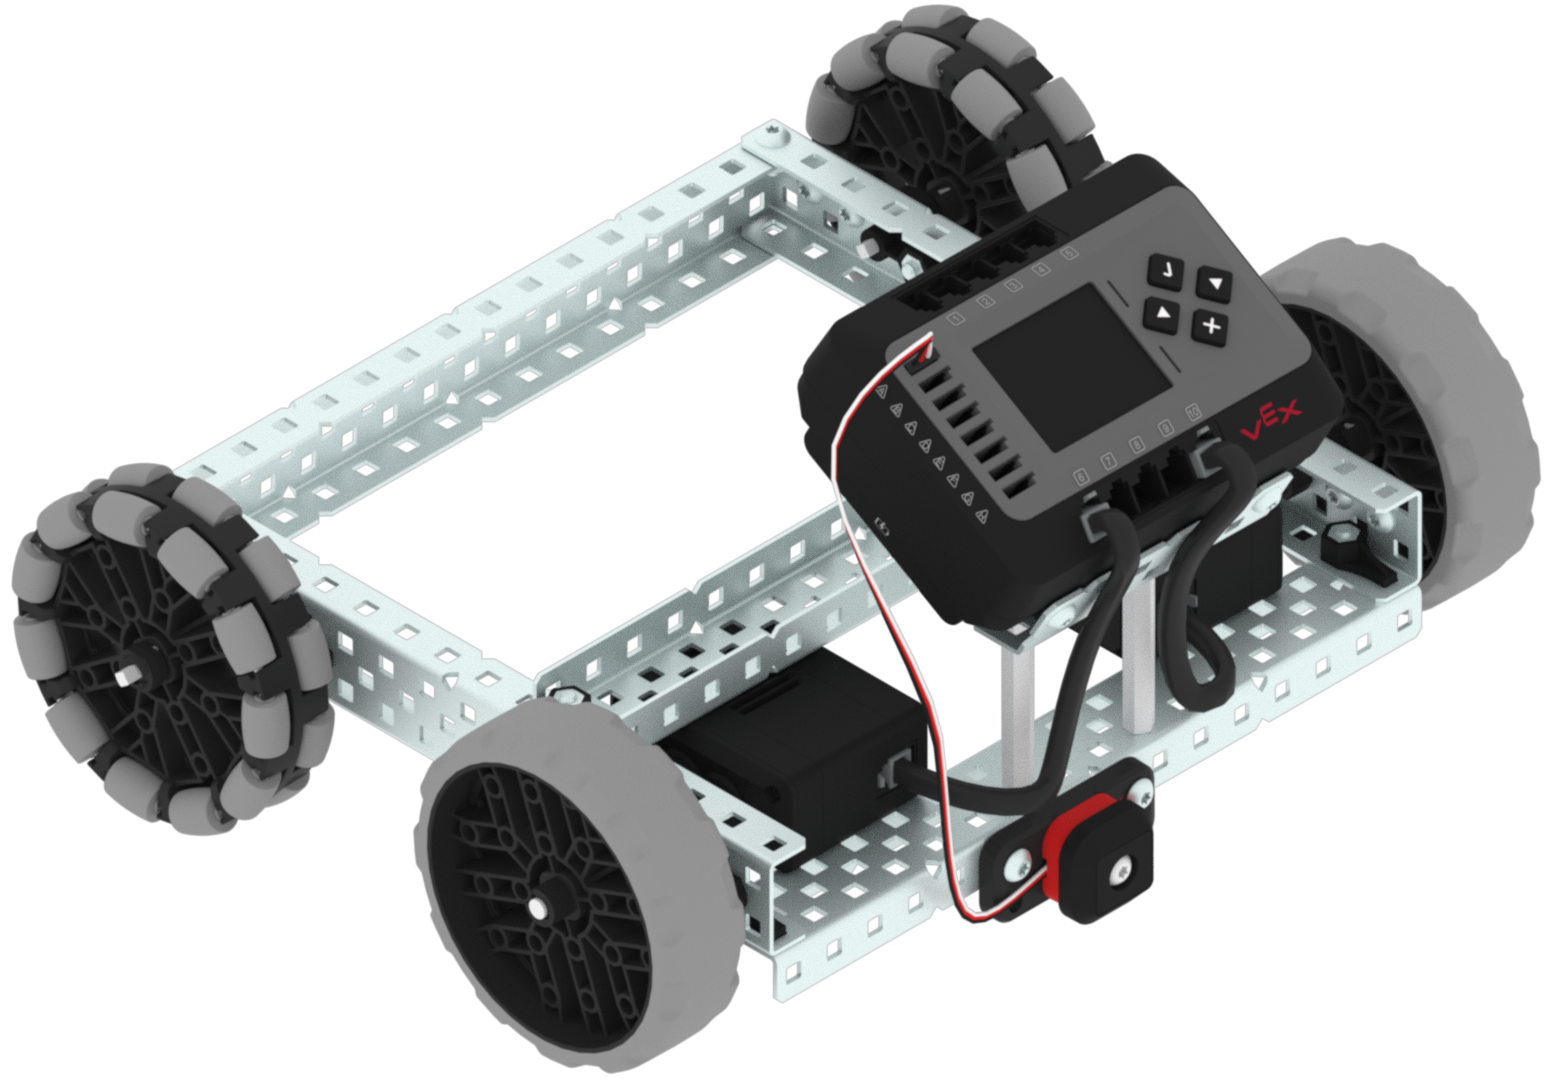
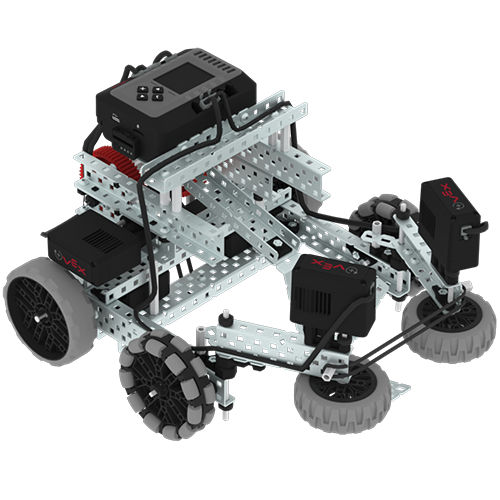
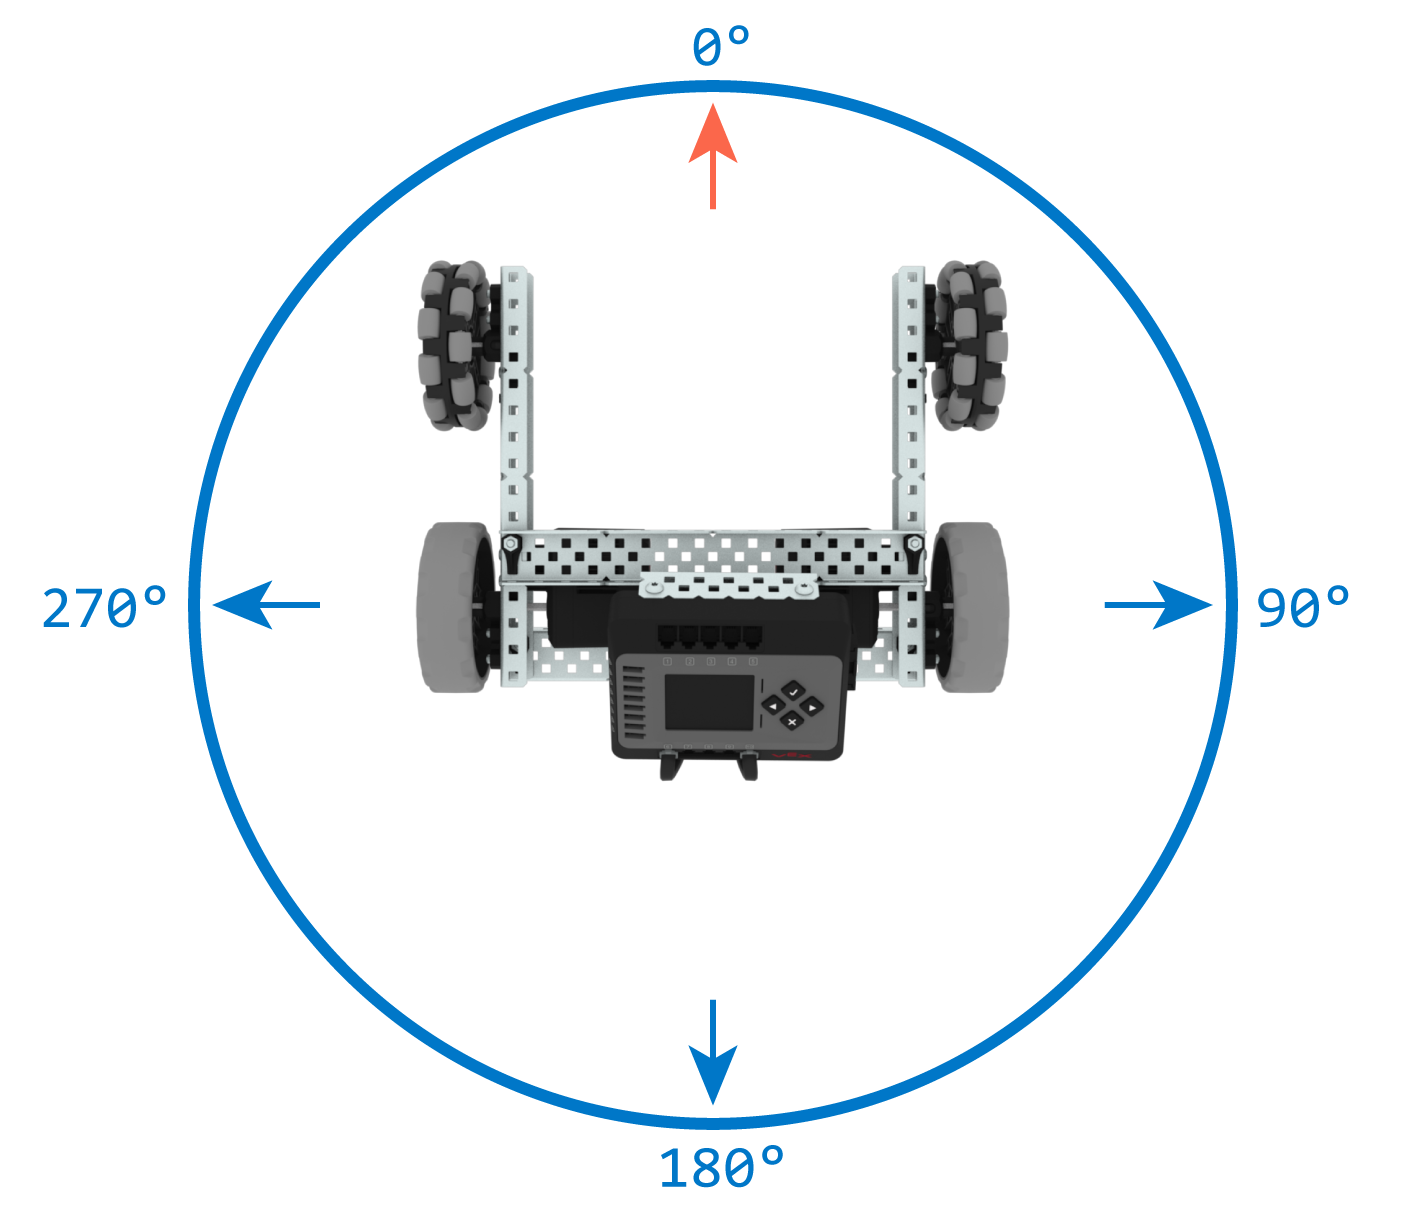
The VEX EXP Brain has an Inertial Sensor built in. The Inertial Sensor reports data about heading, rotation, orientation, and acceleration in the Sensor Dashboard and in VEXcode EXP. It is important to know that when mounting your Brain, try to mount it in a way where the heading, pitch, roll and yaw aligns with the heading of the robot for simplicity. This is taken into account with the BaseBot, Clawbot, and CatapultBot (image below), but should be considered with custom builds. If your brain is not aligned with your robot, the data you receive has the potential to be wrong.
Usage
It is cool to think about how these sensors technically give life to these builds, as they’re designed after our real life senses. Think about it practically, in what scenarios would you use a certain sense?
Bumper Switch
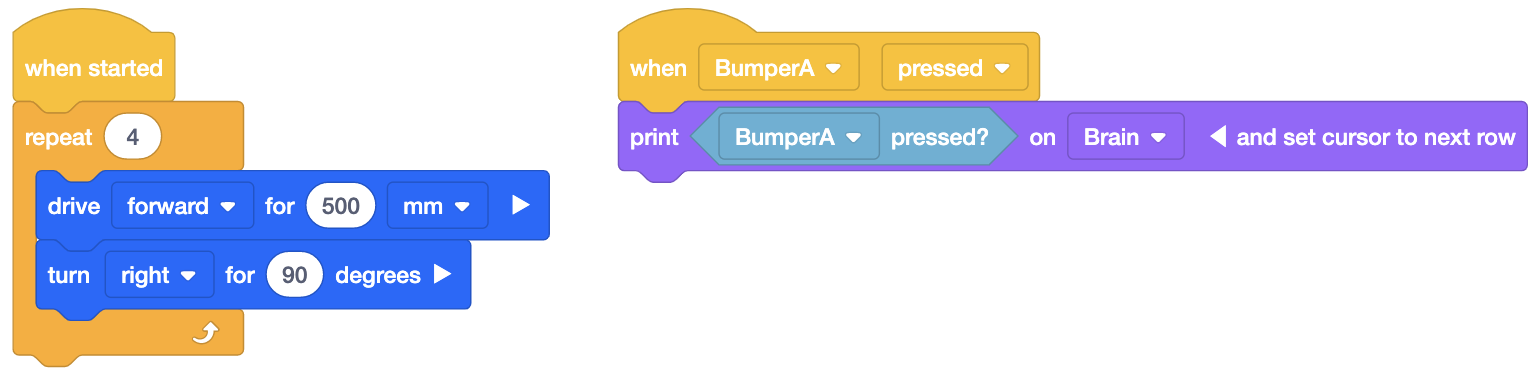
After you have added the Bumper Switch as a device in VEXcode EXP, there are two main scenarios in which it is useful. These scenarios involve when the code senses a press, and bumper events. Press sensing allows your robot to detect when something presses on the Bumper Switch, while bumper events allows you to run specific code when detecting something pressing on the Bumper Switch. The scenario used the most with EXP involves the bumper determining if your robot has come into contact with another object. In the first image below, the user has coded that if the Bumper Switch comes into contact with anything, the robot will stop driving forward. Knowing the use of the Bumper Switch, you can code your robot to do anything after it has been pressed.
For example, you could code it to back up, turn, stop driving, or just end the entire project. Another scenario involves the Bumper Switch placed near the top of the robot, and out of the way of structural pieces to be used as an emergency stop by the operator. Similar to the previous example, we can analyze the data and use it to make a decision. The example they run with in the image on the right is printing that the Bumper Switch has been pressed on the brain. What uses can you think of? Think of it this way, if you crash your car into a wall, what is your reaction? Reverse? Stop driving?
Optical Sensor
The Optical Sensor is a versatile tool and has a range of uses. After you have added the Optical Sensor as a device in VEXcode EXP, you could code and use the Optical sensor to:
- Turn the sensor’s white LED lights on or off.
- Set the white LED lights' percentage of power.
- Detect an object.
- Detect a color.
- Measure the percent brightness of ambient light.
- Measure the hue of a color in degrees.
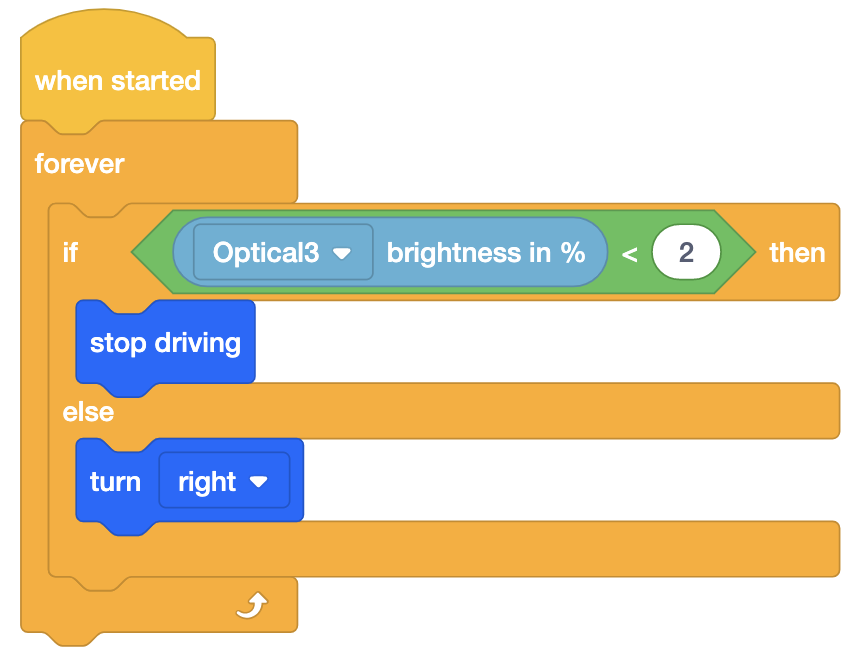
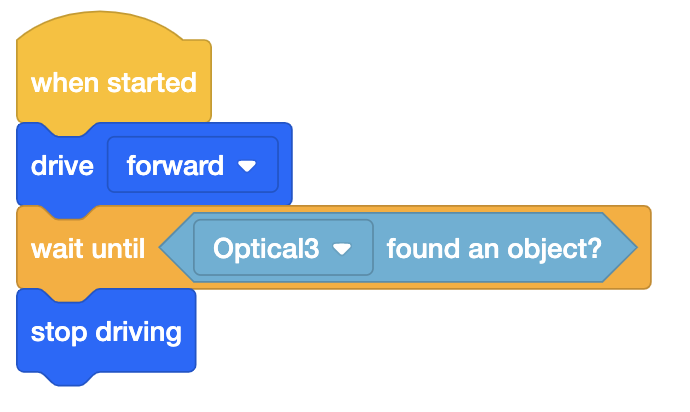
The scenario used the most with EXP involves the Optical Sensor determining the color of another object. Next, analyzing the data depends entirely on what you are using the sensor for. Want the robot to wrangle up Buckyballs of one color? Avoid a certain color? Stop driving once it finds a particular color? The Optical Sensor is a great tool as you can use it in any way you can think of related to hue or ambient light detection. Other scenarios include the robot stops driving when an object is detected, the robot stops driving when the brightness becomes greater than a certain value, or anywhere else color and brightness sensing is required for the robot.
Distance Sensor
The Distance Sensor can produce several measurements which can be used to change the behavior of the robot once it is added to VEXcode. The EXP Brain in concert with a user project can be used to convert the Distance Sensor readings into:
- Distance to an object measured in centimeters, millimeters, or inches.
- Object velocity in meters per second.
- Object size is small, medium, or large.
- Object found.
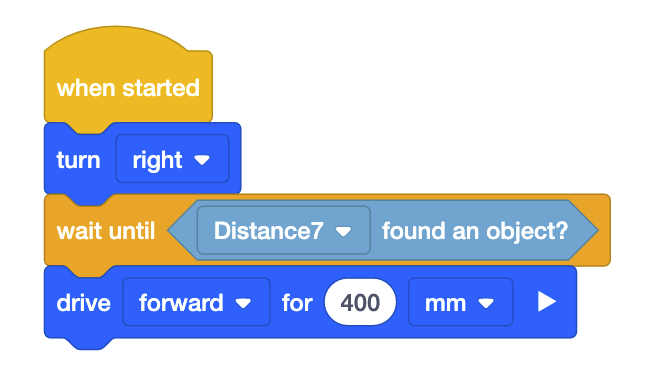
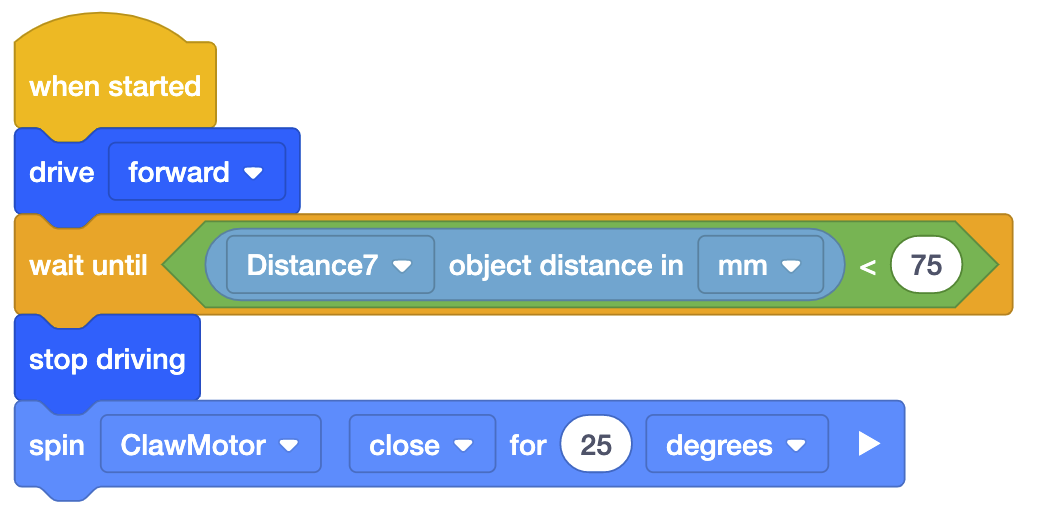
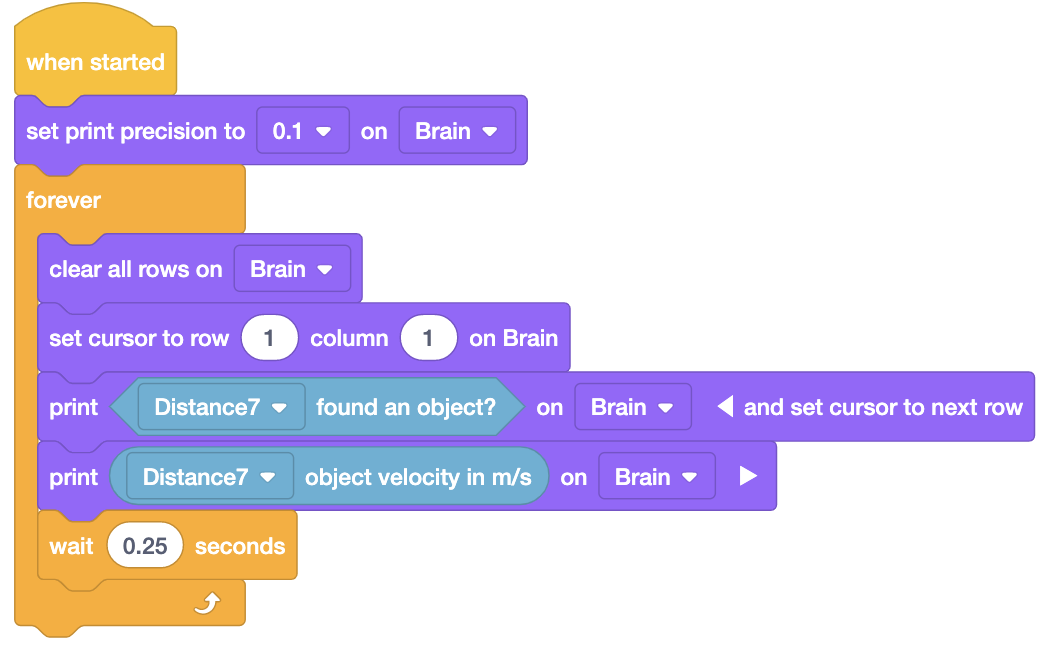
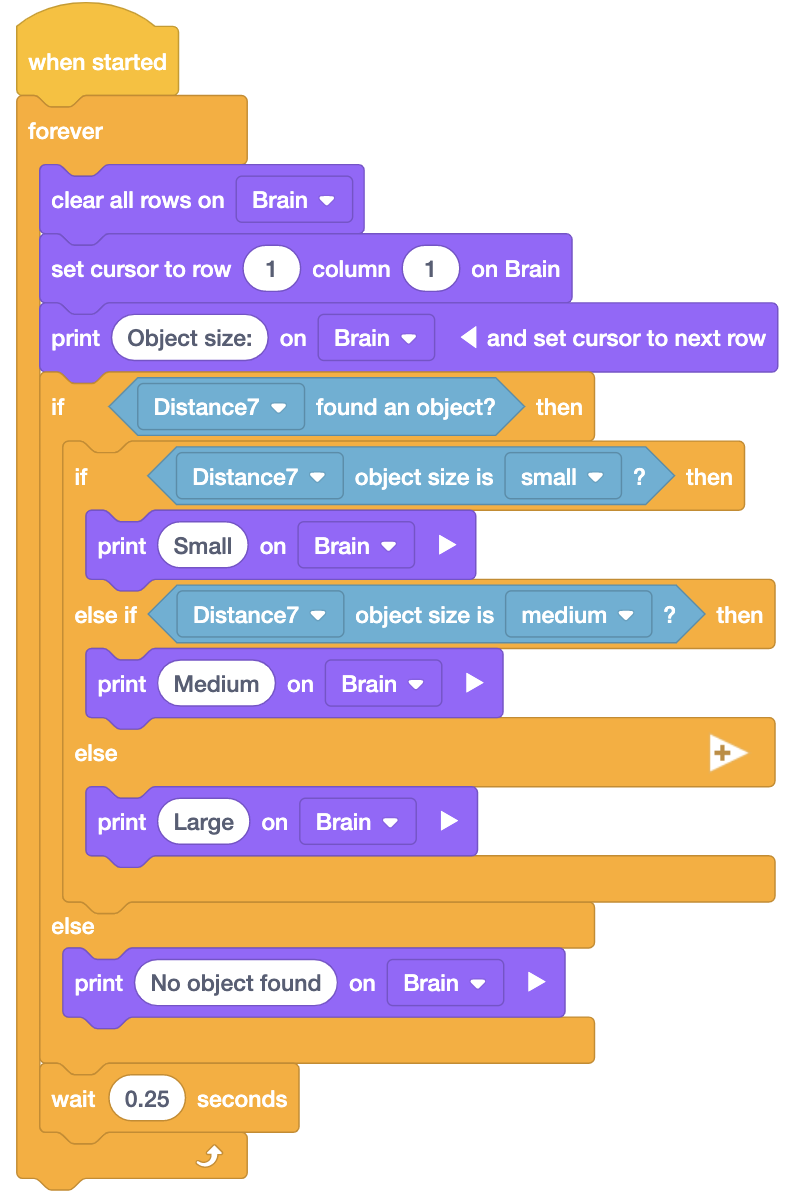
The scenario used the most with EXP involves the Distance Sensor determining the distance to another object. Like the examples listed with the other sensors, the usage depends on the situation and what you want. In the first image, the code calls for the robot to spin until it detects an object and to then drive forward for 400 mm once it does. The second example has the Clawbot close its claw once an object is closer than 75mm. Other scenarios include the robot detecting an object and either avoiding or approaching the object, determining the distance to grab it, reporting object velocity on the brain, as well as object relative size, both for the operator of the robot. Utilizing any of the Distance Sensor’s functions allows you to react to what is happening. The question that follows is how do you want and need your robot to react?

Inertial Sensor Data from the VEX EXP Brain
Using the data from the Inertial Sensor is incorporated into your code. Understand that you are able to reduce your robot's speed, change heading, pitch, yaw, or roll because of the inertial sensor. When you tell the robot to turn right, either through VEXcode or the controller, it will prompt the heading to change accordingly. Using this sensor allows you to move your robot in space.
Application
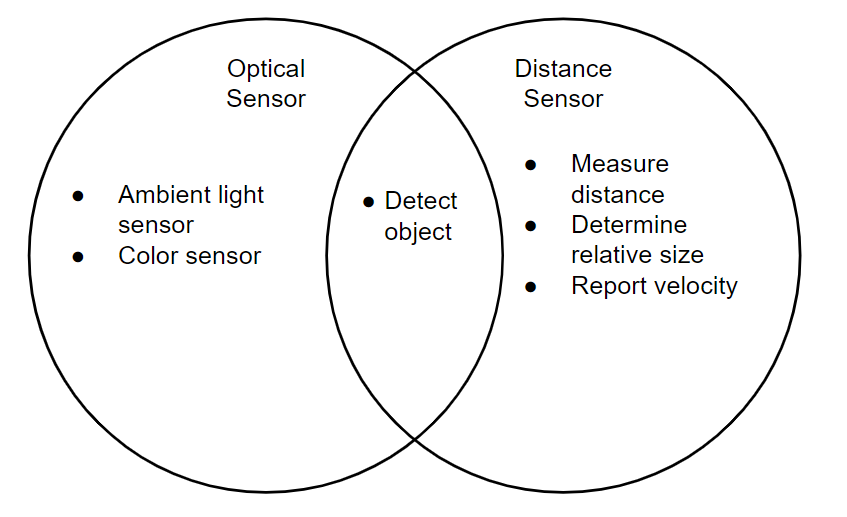
Using the information provided above, should a situation arise in which a sensor is needed, be sure to place it in the most optimal location on your build per its use. Still not sure? Put yourself in the robot’s shoes. Where is the most optimal location for your eyes? What about touch? When it comes to which sensor you should use, there is no correct answer. You should base it off what you need done, and which sensor can accomplish that task. See the Venn diagram below; if you were looking to use a sensor to detect an object, you could use either the Distance Sensor or the Optical Sensor. Understand that each sensor has its own capabilities, then choose the one that will accomplish your needs.
Remember that EXP is also the classroom equivalent of V5. V5 sensors are backwards compatible with the EXP Brain as well as code, and they are even implemented into the code. Want to sense more with your EXP Kit? Try using V5’s sensors.